Battery switch on travel trailer function is crucial for managing your RV’s power. Understanding how to use your battery switch—whether it’s a rotary, rocker, or other type—is key to preventing electrical issues and maximizing your battery life. This guide breaks down everything you need to know, from basic operation to advanced troubleshooting and maintenance.
We’ll cover the different types of switches, their pros and cons, and step-by-step instructions for safe operation. Learn how to connect and disconnect batteries safely, troubleshoot common problems, and perform essential maintenance to keep your system running smoothly. We’ll also explore the impact of the battery switch on your trailer’s various systems and how to conserve energy.
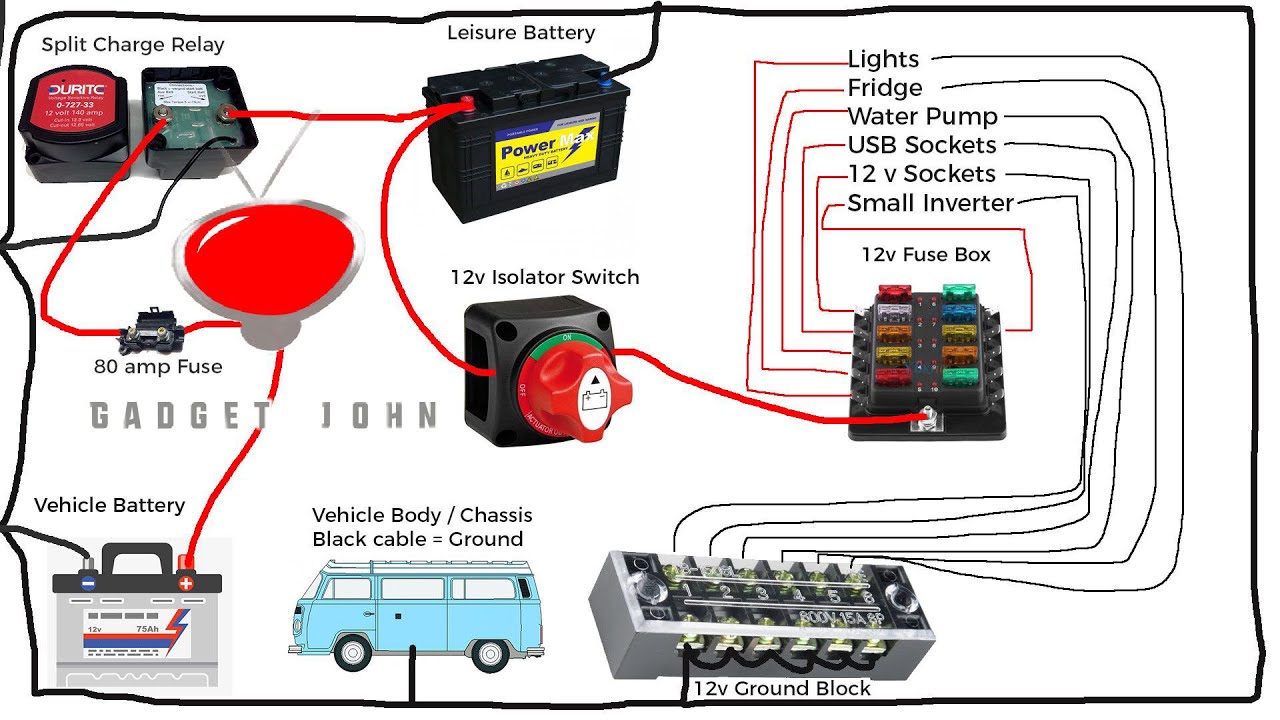
Battery Switch Functionality and Operation
Understanding your travel trailer’s battery switch is crucial for managing power and preventing electrical issues. This switch allows you to select which battery (or batteries) provide power to your trailer’s systems, offering flexibility and control over your power resources. Proper operation and maintenance are key to maximizing battery life and preventing damage to your electrical system.
A typical travel trailer battery switch is a multi-position switch, usually with three or more positions. The exact operation might vary slightly depending on the brand and model of your switch, but the general principles remain consistent. Let’s explore the common functionalities and how to use them safely.
Battery Switch Positions and Electrical Flow, Battery switch on travel trailer function
The diagrams below illustrate how the electrical current flows through the switch in its various positions. Assume we have two batteries, Battery 1 and Battery 2, connected to the switch. The switch’s output then feeds the trailer’s 12V system.
Diagram 1: Battery 1 Only
Imagine a simple circuit. A line represents the positive (+) wire from Battery 1, connecting directly to the switch. Another line from the switch’s output connects to the positive (+) terminal of the trailer’s electrical system. A separate line shows the negative (-) wire from Battery 1 connecting directly to the negative (-) terminal of the trailer’s system. Battery 2 is completely disconnected from the circuit.
Only Battery 1 supplies power to the trailer.
Diagram 2: Battery 2 Only
Similar to Diagram 1, but now the positive (+) wire from Battery 2 is connected to the switch, and its output is connected to the positive (+) terminal of the trailer’s electrical system. The negative (-) wire from Battery 2 connects to the negative (-) terminal of the trailer’s system. Battery 1 is isolated from the circuit. Only Battery 2 powers the trailer.
Diagram 3: Both Batteries Combined (Parallel)
In this configuration, both Battery 1 and Battery 2 are connected in parallel to the switch’s output. Imagine two separate positive (+) wires from each battery connecting to the switch. The switch’s output combines these two positive (+) currents into a single line leading to the positive (+) terminal of the trailer’s electrical system. Similarly, two negative (-) wires from each battery connect to the trailer’s negative (-) terminal, effectively combining the capacity of both batteries.
This provides maximum power output.
Diagram 4: Off Position
In the “OFF” position, all connections between the batteries and the trailer’s electrical system are broken. No power flows to the trailer, preventing accidental discharge of the batteries.
Safety Precautions for Battery Switch Use and Maintenance
Before working with your battery switch or batteries, always disconnect the negative (-) terminal of the batteries first. This prevents accidental shorts and potential sparks.
When switching between positions, do so slowly and deliberately to avoid arcing or damage to the switch. Avoid making rapid or jerky movements. Regularly inspect the switch for any signs of corrosion, loose connections, or damage. Clean any corrosion with a wire brush and baking soda solution. If you notice any damage, replace the switch immediately.
So, you’re an audiophile who loves to travel? Awesome! First things first, sort out your insurance. Check out Aon travel insurance for peace of mind knowing your precious gear is covered. Then, focus on your portable audio setup. Building a great mobile listening experience is key, and audiophile travel aetup guides can help you curate the perfect kit for your next adventure.
Remember, good sound shouldn’t be confined to your home!
Always wear appropriate safety glasses when working with batteries or electrical components. Batteries produce corrosive fumes, so ensure adequate ventilation. Never touch the terminals of the battery with bare hands, and avoid wearing loose clothing or jewelry that could come into contact with electrical components. If you are unsure about any aspect of your battery switch or electrical system, consult a qualified RV technician.
Troubleshooting Common Battery Switch Issues

Your travel trailer’s battery switch is crucial for managing power, but problems can arise. Understanding common issues and how to troubleshoot them can save you frustration and potential damage. This section will guide you through identifying and resolving some typical battery switch problems.
Battery Switch Showing No Power
No power to your trailer is a common frustration. This can stem from several sources, not necessarily just the switch itself. A systematic approach is key to finding the culprit.
- Check the Switch Position: Ensure the switch is firmly in the “on” position for either the battery or shore power, depending on your power source. A loose or improperly positioned switch is a frequent cause of no power.
- Inspect Fuses and Breakers: Check both the fuses within the battery switch itself and the main circuit breakers in your trailer. A blown fuse or tripped breaker will interrupt power flow. Replace blown fuses with the correct amperage rating. Reset tripped breakers.
- Test Battery Connection: Verify the battery terminals are clean, tight, and properly connected to both the battery and the switch. Corrosion can impede current flow. Clean terminals with a wire brush and baking soda solution.
- Examine Wiring: Look for any visible damage to the wiring between the battery, the switch, and the trailer’s electrical system. Look for loose connections, frayed wires, or signs of burning. Repair or replace damaged wiring as needed. Consult a professional electrician if you’re not comfortable with electrical work.
- Test the Battery: Use a multimeter to check the battery voltage. A low or completely dead battery will not provide power to the trailer, regardless of the switch position. If the battery is dead, charge it or replace it.
Troubleshooting a Flowchart for “No Power to Trailer”
The following describes a flowchart to troubleshoot the “no power to trailer” issue. Imagine a diagram with boxes and arrows.Start -> Check Switch Position (On?) -> Yes: Proceed to Check Fuses/Breakers; No: Turn switch on -> Check Fuses/Breakers (blown/tripped?) -> Yes: Replace/Reset; No: Proceed to Test Battery Connection -> Loose/Corroded? -> Yes: Clean/Tighten; No: Proceed to Examine Wiring -> Damaged?
-> Yes: Repair/Replace; No: Proceed to Test Battery -> Dead? -> Yes: Charge/Replace; No: Check Shore Power Connection (if applicable) -> Issue Resolved? -> Yes: End; No: Consult Electrician
Flickering Lights or Intermittent Power
Flickering lights or intermittent power usually point to a problem with loose connections or corroded terminals.
So, you’re an audiophile who loves to travel? Awesome! First, check out this guide on creating the perfect audiophile travel setup to ensure your ears are happy on the go. Then, before you even pack your headphones, make sure you’ve sorted out your travel insurance. Getting Aon travel insurance is a smart move – you don’t want to be stuck with a hefty repair bill if your precious gear gets damaged.
Peace of mind is key, right?
- Inspect all Connections: Thoroughly examine all wire connections at the battery, the switch, and throughout the trailer’s electrical system. Pay close attention to any connections that may be subject to vibration or movement.
- Clean Terminals and Connections: Clean all battery terminals and wire connections using a wire brush and baking soda solution. Apply a corrosion inhibitor to prevent future corrosion.
- Check for Loose Wiring: Look for any loose or poorly secured wiring that could be causing intermittent contact. Secure loose wires and re-connect any that have come undone.
- Consider Grounding Issues: A poor ground connection can cause flickering lights. Ensure the trailer’s ground wire is securely connected to a good ground point.
Battery Switch Maintenance and Replacement
Keeping your travel trailer’s battery switch in good working order is crucial for reliable power. Regular maintenance prevents costly repairs and ensures you’re always ready for your next adventure. Neglecting maintenance can lead to corrosion, poor connections, and ultimately, a failed switch. This section covers best practices for maintenance and the process of replacing a faulty switch.
Battery Switch Maintenance
Proper maintenance significantly extends the lifespan of your battery switch. A simple visual inspection and occasional cleaning can prevent many problems. Start by regularly checking the switch for signs of corrosion, loose connections, or damage. Corrosion is a common issue, particularly in humid environments.
Cleaning the switch involves removing any corrosion buildup with a wire brush and a solution of baking soda and water. Be sure to disconnect the battery cables before cleaning to prevent accidental short circuits. After cleaning, apply a dielectric grease to the terminals to prevent future corrosion. This grease helps repel moisture and maintain a clean connection. Remember to always reconnect the battery cables securely after cleaning and maintenance.
Battery Switch Replacement
If your battery switch fails despite regular maintenance, replacement is necessary. Replacing a battery switch is a relatively straightforward task, but safety precautions are paramount. Always disconnect the battery cables before starting any work.
The process typically involves removing the old switch from its mounting location, noting the wiring configuration before disconnecting the cables, and installing the new switch, ensuring the wires are connected correctly according to the original configuration. Refer to your trailer’s wiring diagram if you are unsure about the correct wiring scheme. Use appropriately sized wire nuts or crimp connectors to secure the connections, and again, apply dielectric grease to the terminals to prevent corrosion.
Finally, firmly secure the new switch in its mounting location. Once everything is reconnected, test the switch to ensure it functions correctly.
Selecting a Replacement Battery Switch
Choosing the right replacement battery switch is essential for safety and proper operation. The most important factors to consider are the amperage rating and the number of battery banks the switch is designed to handle.
Your trailer’s electrical system will determine the appropriate amperage rating. The switch’s amperage rating should be equal to or greater than the maximum current your batteries and electrical system can draw. For example, if your trailer’s system draws a maximum of 100 amps, you’ll need a switch with at least a 100-amp rating. Similarly, the number of battery banks (usually two, for house and starting batteries) should match the switch’s capabilities.
If your trailer has two battery banks, you need a two-bank switch. Incorrectly sizing the switch can lead to overheating and potential fire hazards.
Mastering your travel trailer’s battery switch is a simple yet powerful way to enhance your RV experience. By understanding its function, performing regular maintenance, and knowing how to troubleshoot common problems, you’ll ensure reliable power for all your adventures. Remember safety first – always disconnect batteries before working on the electrical system. Happy travels!
Q&A: Battery Switch On Travel Trailer Function
What happens if I leave my battery switch on all the time?
Leaving your battery switch on constantly can drain your batteries, especially if you have parasitic draws (small electrical loads that continue even when the trailer is off). It’s best to turn it off when not using the trailer for extended periods.
Can I use different types of batteries with my battery switch?
Generally, you should only use the same type and voltage of batteries (e.g., 12V deep-cycle) in parallel with your switch. Mixing battery types can lead to damage or reduced lifespan.
How often should I check my battery switch?
Regularly inspect your battery switch for corrosion, loose connections, or any signs of damage. A visual check every few months, or before each trip, is recommended.
My battery switch is making a clicking sound. What’s wrong?
A clicking sound could indicate a problem with the switch itself, a low battery, or a short circuit. Check your battery voltage and connections before attempting any repairs.
